Building a Todo List App with Next.js
Day 28: Todo List — 30 Days of 30 Projects Challenge
Hey everyone, I hope you’re all doing well and enjoying your coding journey, Am I right? By the way, today marks the 28th day of the 30-day of 30-projects challenge. Our 28th project will be creating a mini Next.js application — a todo list. Please make sure to clap and comment on this blog post. It motivates me to create more amazing content like this, Let’s get started straight away.

Overview of the Mini Next.js Application
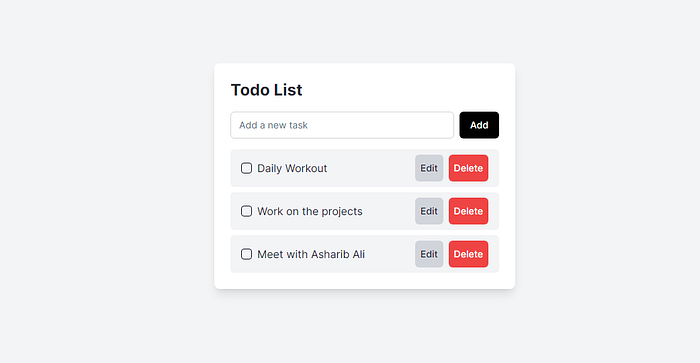
Our Todo List application allows users to:
- Add, edit, and delete tasks
- Mark tasks as complete
- Persistent storage using local storage
Tech-Stack Used:
- Next.js: A React framework for building full-stack web applications.
- React: A JavaScript library for building user interfaces.
- Tailwind CSS: A utility-first CSS framework for styling.
- Shadcn UI: Beautifully designed tailwindcss components that you can copy and paste into your application.
- Vercel: For deploying the Nextjs web application.
Initialize a Nextjs project
Start by following this guide to set up the new project.
- Go to the “components” folder.
- Create a new file named “
todo-list.tsx”. - This file will manage the entire functionality of the project.
We will go through the code step-by-step to make it easy to understand.
Component Breakdown
Import Statements
"use client";
import { useState, useEffect, ChangeEvent, KeyboardEvent } from "react";
import { Input } from "@/components/ui/input";
import { Button } from "@/components/ui/button";
import { Checkbox } from "@/components/ui/checkbox";
"use client";Enables client-side rendering for this component.useState, useEffect, ChangeEvent, KeyboardEvent: React hooks for managing state, handling events, and running side effects.Input, Button, Checkbox: Custom UI components from the Shadcn UI library.
Task Data Interface
interface Task {
  id: number;
  text: string;
  completed: boolean;
}
Task Interface: Defines the structure of a task object with an id (number), text (string), and completed (boolean) to ensure consistent and accurate handling of task data.
Interface in TypeScript: A TypeScript interface is a way to define the shape of an object, specifying the types of its properties, which helps in type-checking and ensuring that objects have the required structure.
State and References
const [tasks, setTasks] = useState<Task[]>([]);
const [newTask, setNewTask] = useState<string>("");
const [editingTaskId, setEditingTaskId] = useState<number | null>(null);
const [editedTaskText, setEditedTaskText] = useState<string>("");
const [isMounted, setIsMounted] = useState<boolean>(false);tasks: Holds an array of task objects, representing the list of tasks.newTask: Stores the input value for a new task that is being added.editingTaskId: Holds the ID of the task that is currently being edited, ornullif no task is being edited.editedTaskText: Stores the updated text for the task that is currently being edited.isMounted: Tracks whether the component has been mounted, storing a boolean value.
Effect Hook for Component Mount
useEffect(() => {
  setIsMounted(true);
  const savedTasks = localStorage.getItem("tasks");
  if (savedTasks) {
    setTasks(JSON.parse(savedTasks) as Task[]);
  }
}, []);- Effect Hook: Runs once when the component mounts, setting the
isMountedstate totrueand loading tasks from local storage if available, updating thetasksstate with the parsed data.
Component Mounting: Component mounting refers to the phase in a React component’s lifecycle when it is being inserted into the DOM for the first time, allowing you to perform setup tasks such as fetching data or initializing state.
Effect Hook for Saving Tasks
useEffect(() => {
  if (isMounted) {
    localStorage.setItem("tasks", JSON.stringify(tasks));
  }
}, [tasks, isMounted]);- Effect Hook: Executes whenever the
tasksstate orisMountedstate changes, saving the current list of tasks to local storage if the component is mounted. - Saving Tasks: Ensures that the list of tasks is persistently stored in local storage, allowing the tasks to be retrieved even after the page is refreshed or revisited.
Local Storage is a web storage mechanism that allows websites to store data in a user’s browser with no expiration date. This data persists even after the browser is closed and reopened. It is useful for storing information such as user preferences, session data, or any other data that should persist between page reloads and browser sessions. Data in Local Storage is stored as key-value pairs and can be accessed using JavaScript.
Add Task Function
const addTask = (): void => {
  if (newTask.trim() !== "") {
    setTasks([...tasks, { id: Date.now(), text: newTask, completed: false }]);
    setNewTask("");
  }
};addTaskFunction: Adds a new task to the task list if thenewTaskinput is not empty after trimming whitespace.- Task Addition: Creates a new task object with a unique
id, the currentnewTasktext, andcompletedset tofalse, then updates thetasksstate with the new task appended. - Input Reset: Clears the
newTaskinput field after successfully adding the new task.
Toggle Task Completion Function
const toggleTaskCompletion = (id: number): void => {
  setTasks(
    tasks.map((task) =>
      task.id === id ? { ...task, completed: !task.completed } : task
    )
  );
};toggleTaskCompletionFunction: Toggles the completion status of a task by itsid.- Task Update: Updates the
tasksstate by mapping over the current tasks, flipping thecompletedstatus of the task with the matchingidwhile keeping other tasks unchanged. - Completion Status: Ensures that the specified task’s
completedproperty is toggled betweentrueandfalse.
Start Editing Task Function
const startEditingTask = (id: number, text: string): void => {
  setEditingTaskId(id);
  setEditedTaskText(text);
}startEditingTaskFunction: Initiates the editing process for a specified task.- State Updates: Sets the
editingTaskIdstate to the ID of the task being edited and updateseditedTaskTextwith the current text of the task. - Task Editing: Prepares the component to display and manage the editing of the selected task.
Update Task Function
const updateTask = (): void => {
  if (editedTaskText.trim() !== "") {
    setTasks(
      tasks.map((task) =>
        task.id === editingTaskId ? { ...task, text: editedTaskText } : task
      )
    );
    setEditingTaskId(null);
    setEditedTaskText("");
  }
};updateTaskFunction: Updates the text of the currently edited task if the new text is not empty after trimming whitespace.- Task Update: Maps over the
tasksstate, updating the text of the task with the matchingeditingTaskIdwhile keeping other tasks unchanged. - State Reset: Clears the
editingTaskIdandeditedTaskTextstates, signaling the end of the editing process.
Delete Task Function
const deleteTask = (id: number): void => {
  setTasks(tasks.filter((task) => task.id !== id));
};deleteTaskFunction: Removes a task from the list by itsid.- Task Deletion: Filters out the task with the specified
idfrom thetasksstate, updating the state to exclude the deleted task. - State Update: Ensures the
tasksstate only contains tasks that do not match the specifiedid.
JSX Return Statement
return (
  <div className="flex flex-col items-center justify-center h-screen bg-gray-100 dark:bg-gray-900">
    <div className="w-full max-w-md bg-white dark:bg-gray-800 shadow-lg rounded-lg p-6">
      <h1 className="text-2xl font-bold mb-4 text-gray-800 dark:text-gray-200">
        Todo List
      </h1>
      <div className="flex items-center mb-4">
        <Input
          type="text"
          placeholder="Add a new task"
          value={newTask}
          onChange={(e: ChangeEvent<HTMLInputElement>) => setNewTask(e.target.value)}
          className="flex-1 mr-2 px-3 py-2 rounded-md border border-gray-300 dark:border-gray-600 dark:bg-gray-700 dark:text-gray-200"
        />
        <Button
          onClick={addTask}
          className="bg-black hover:bg-slate-800 text-white font-medium py-2 px-4 rounded-md"
        >
          Add
        </Button>
      </div>
      <div className="space-y-2">
        {tasks.map((task) => (
          <div
            key={task.id}
            className="flex items-center justify-between bg-gray-100 dark:bg-gray-700 rounded-md px-4 py-2"
          >
            <div className="flex items-center">
              <Checkbox
                checked={task.completed}
                className="mr-2"
                onCheckedChange={() => toggleTaskCompletion(task.id)}
              />
              {editingTaskId === task.id ? (
                <Input
                  type="text"
                  value={editedTaskText}
                  onChange={(e: ChangeEvent<HTMLInputElement>) => setEditedTaskText(e.target.value)}
                  onKeyDown={(e: KeyboardEvent<HTMLInputElement>) => {
                    if (e.key === "Enter") {
                      updateTask();
                    }
                  }}
                  className="flex-1 px-3 py-2 rounded-md border border-gray-300 dark:border-gray-600 dark:bg-gray-800 dark:text-gray-200"
                />
              ) : (
                <span
                  className={`flex-1 text-gray-800 dark:text-gray-200 ${
                    task.completed
                      ? "line-through text-gray-500 dark:text-gray-400"
                      : ""
                  }`}
                >
                  {task.text}
                </span>
              )}
            </div>
            <div className="flex items-center">
              {editingTaskId === task.id ? (
                <Button
                  onClick={updateTask}
                  className="bg-black hover:bg-slate-800 text-white font-medium py-1 px-2 rounded-md mr-2"
                >
                  Save
                </Button>
              ) : (
                <Button
                  onClick={() => startEditingTask(task.id, task.text)}
                  className="bg-gray-300 hover:bg-gray-400 text-gray-800 dark:bg-gray-600 dark:hover:bg-gray-500 dark:text-gray-200 font-medium py-1 px-2 rounded-md mr-2"
                >
                  Edit
                </Button>
              )}
              <Button
                onClick={() => deleteTask(task.id)}
                className="bg-red-500 hover:bg-red-600 text-white font-medium py-1 px-2 rounded-md"
              >
                Delete
              </Button>
            </div>
          </div>
        ))}
      </div>
    </div>
  </div>
);- Container Div: Centers the todo list UI on the screen with flexbox, providing a light or dark background based on the theme.
- Card Component: Houses the todo list, including a title, input field for new tasks, and a list of tasks with action buttons for editing, completing, and deleting tasks.
- Conditional Task Rendering: Displays each task with a checkbox, text, and buttons for editing and deleting, including conditional input fields and save buttons for tasks being edited.
(Bonus just for you): Full Code with Comments
"use client"; // Enables client-side rendering for this component

// Import necessary hooks and types from React
import { useState, useEffect, ChangeEvent, KeyboardEvent } from "react";

// Import custom UI components from the UI directory
import { Input } from "@/components/ui/input";
import { Button } from "@/components/ui/button";
import { Checkbox } from "@/components/ui/checkbox";

// Define a TypeScript interface for task data
interface Task {
  id: number;
  text: string;
  completed: boolean;
}

// Default export of the TodoListComponent function
export default function TodoList() {
  // State hooks for managing tasks, new task input, editing task, and component mount status
  const [tasks, setTasks] = useState<Task[]>([]);
  const [newTask, setNewTask] = useState<string>("");
  const [editingTaskId, setEditingTaskId] = useState<number | null>(null);
  const [editedTaskText, setEditedTaskText] = useState<string>("");
  const [isMounted, setIsMounted] = useState<boolean>(false);

  // Effect hook to run on component mount
  useEffect(() => {
    setIsMounted(true); // Set mounted status to true
    // Load tasks from local storage
    const savedTasks = localStorage.getItem("tasks");
    if (savedTasks) {
      setTasks(JSON.parse(savedTasks) as Task[]); // Parse and set tasks from local storage
    }
  }, []);

  // Effect hook to save tasks to local storage whenever they change
  useEffect(() => {
    if (isMounted) {
      localStorage.setItem("tasks", JSON.stringify(tasks)); // Save tasks to local storage
    }
  }, [tasks, isMounted]);

  // Function to add a new task
  const addTask = (): void => {
    if (newTask.trim() !== "") {
      // Add the new task to the task list
      setTasks([...tasks, { id: Date.now(), text: newTask, completed: false }]);
      setNewTask(""); // Clear the new task input
    }
  };

  // Function to toggle the completion status of a task
  const toggleTaskCompletion = (id: number): void => {
    setTasks(
      tasks.map((task) =>
        task.id === id ? { ...task, completed: !task.completed } : task
      )
    );
  };

  // Function to start editing a task
  const startEditingTask = (id: number, text: string): void => {
    setEditingTaskId(id); // Set the task ID being edited
    setEditedTaskText(text); // Set the text of the task being edited
  };

  // Function to update an edited task
  const updateTask = (): void => {
    if (editedTaskText.trim() !== "") {
      // Update the task text
      setTasks(
        tasks.map((task) =>
          task.id === editingTaskId ? { ...task, text: editedTaskText } : task
        )
      );
      setEditingTaskId(null); // Clear the editing task ID
      setEditedTaskText(""); // Clear the edited task text
    }
  };

  // Function to delete a task
  const deleteTask = (id: number): void => {
    setTasks(tasks.filter((task) => task.id !== id)); // Filter out the task to be deleted
  };

  // Avoid rendering on the server to prevent hydration errors
  if (!isMounted) {
    return null;
  }

  // JSX return statement rendering the todo list UI
  return (
    <div className="flex flex-col items-center justify-center h-screen bg-gray-100 dark:bg-gray-900">
      {/* Center the todo list within the screen */}
      <div className="w-full max-w-md bg-white dark:bg-gray-800 shadow-lg rounded-lg p-6">
        {/* Header with title */}
        <h1 className="text-2xl font-bold mb-4 text-gray-800 dark:text-gray-200">
          Todo List
        </h1>
        {/* Input for adding new tasks */}
        <div className="flex items-center mb-4">
          <Input
            type="text"
            placeholder="Add a new task"
            value={newTask}
            onChange={
              (e: ChangeEvent<HTMLInputElement>) => setNewTask(e.target.value) // Update new task input
            }
            className="flex-1 mr-2 px-3 py-2 rounded-md border border-gray-300 dark:border-gray-600 dark:bg-gray-700 dark:text-gray-200"
          />
          <Button
            onClick={addTask}
            className="bg-black hover:bg-slate-800 text-white font-medium py-2 px-4 rounded-md"
          >
            Add
          </Button>
        </div>
        {/* List of tasks */}
        <div className="space-y-2">
          {tasks.map((task) => (
            <div
              key={task.id}
              className="flex items-center justify-between bg-gray-100 dark:bg-gray-700 rounded-md px-4 py-2"
            >
              <div className="flex items-center">
                {/* Checkbox to toggle task completion */}
                <Checkbox
                  checked={task.completed}
                  className="mr-2"
                  onCheckedChange={() => toggleTaskCompletion(task.id)}
                />
                {editingTaskId === task.id ? (
                  // Input for editing task text
                  <Input
                    type="text"
                    value={editedTaskText}
                    onChange={
                      (e: ChangeEvent<HTMLInputElement>) =>
                        setEditedTaskText(e.target.value) // Update edited task text
                    }
                    onKeyDown={(e: KeyboardEvent<HTMLInputElement>) => {
                      if (e.key === "Enter") {
                        updateTask(); // Update task on Enter key press
                      }
                    }}
                    className="flex-1 px-3 py-2 rounded-md border border-gray-300 dark:border-gray-600 dark:bg-gray-800 dark:text-gray-200"
                  />
                ) : (
                  // Display task text
                  <span
                    className={`flex-1 text-gray-800 dark:text-gray-200 ${
                      task.completed
                        ? "line-through text-gray-500 dark:text-gray-400"
                        : ""
                    }`}
                  >
                    {task.text}
                  </span>
                )}
              </div>
              <div className="flex items-center">
                {editingTaskId === task.id ? (
                  // Button to save edited task
                  <Button
                    onClick={updateTask}
                    className="bg-black hover:bg-slate-800 text-white font-medium py-1 px-2 rounded-md mr-2"
                  >
                    Save
                  </Button>
                ) : (
                  // Button to start editing task
                  <Button
                    onClick={() => startEditingTask(task.id, task.text)}
                    className="bg-gray-300 hover:bg-gray-400 text-gray-800 dark:bg-gray-600 dark:hover:bg-gray-500 dark:text-gray-200 font-medium py-1 px-2 rounded-md mr-2"
                  >
                    Edit
                  </Button>
                )}
                {/* Button to delete task */}
                <Button
                  onClick={() => deleteTask(task.id)}
                  className="bg-red-500 hover:bg-red-600 text-white font-medium py-1 px-2 rounded-md"
                >
                  Delete
                </Button>
              </div>
            </div>
          ))}
        </div>
      </div>
    </div>
  );
}
Okay, you’ve completed the main component with functional UI. Now, you need to import this component into the app directory to use it in the app/page.tsx file. Your final code should look like this:
import TodoList from "@/components/todo-list";

export default function Home() {
  return (
    <div>
      <TodoList />
    </div>
  );
}
Running the Project
To see the todo list in action, follow these steps:
- Start the Development Server: Run
npm run devto start the development server. - Open in Browser: Open
http://localhost:3000in your browser to view the application.
Make sure to test it properly (each and everything) so that we don’t have any errors in the production mode aka when we host on the internet.
Now, we want people to see our application on the internet. All you have to do is create a repository on GitHub and then push your code to it. After that, deploy the Todo List application using Vercel.
Once you’re done with the deployment, please share the application link with me by commenting on this blog post, on Linkedin, and (most importantly, on X a.k.a. Twitter. Tag me there, and I’ll reply and appreciate your efforts) 👀
(Optional): One thing you can do on your own is to add new functionalities, enhance the styling, and improve the overall application. This way, you’ll learn something new by making modifications.
✨ Star Github Repository of the project 👈
Conclusion
In this blog post, we explored the creation of a todo list using Next.js. We covered:
- The purpose and main features of the application.
- A detailed breakdown of the
todo-list.tsxcomponent, explaining how each part of the code works together.
See you tomorrow with the latest project. Happy coding!

Stay updated with the latest in cutting-edge technology! Follow me:
- Twitter: @0xAsharib
- LinkedIn: Asharib Ali
- GitHub: AsharibAli
- Website: asharib.xyz
Thanks for reading!