Building a Countdown Timer App with Next.js
Day 1: Countdown Timer — 30 Days of 30 Projects Challenge
Hey everyone, I hope you're all doing well and enjoying your coding journey, Am I right? By the way, today marks the first day of the 30-day of 30-projects challenge. Our first project will be creating a mini Next.js application—a countdown timer. Please make sure to clap and comment on this blog post. It motivates me to create more amazing content like this, Let’s get started straight away.

Overview of the Mini Next.js Application
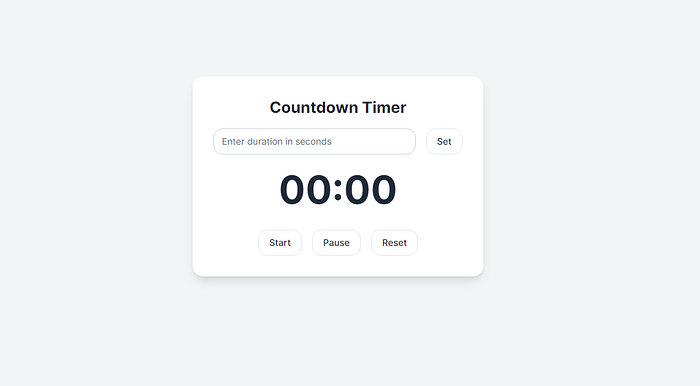
Our Countdown Timer application allows users to:
- Set a time duration
- Start, pause, and reset the timer
- Display the remaining time
Tech-Stack Used:
- Next.js: A React framework for building full-stack web applications.
- React: A JavaScript library for building user interfaces.
- Tailwind CSS: A utility-first CSS framework for styling.
- Shadcn UI: Beautifully designed tailwindcss components that you can copy and paste into your application.
- Vercel: For deploying the Nextjs web application.
Initialize a Nextjs project
Start by following this guide to set up the new project.
- Go to the “components” folder.
- Create a new file named “count-down.tsx”.
- This file will manage the entire functionality of the project.
We will go through the code step-by-step to make it easy to understand.
Component Breakdown
Import Statements
"use client";
import { useState, useRef, useEffect, ChangeEvent } from "react";
import { Input } from "@/components/ui/input";
import { Button } from "@/components/ui/button";
"use client", It enables client-side rendering for this component. By default, Next.js components are server-rendered. If you're wondering what client and server-side rendering are and why Next.js uses SSR by default, let me answer that first:
Client-side rendering (CSR) means the browser renders the web page using JavaScript after receiving it from the server, while server-side rendering (SSR) means the server generates the complete HTML before sending it to the browser. Next.js uses SSR by default because it improves page load times and SEO by delivering fully rendered pages to the browser.
useState,useRef,useEffect: React hooks for managing state, references, and side effects, Now I am sure you have been thinking about what hooks are and state management, and why we need them. Let me explain:
Hooks are special functions in React that let you use state and other features without writing a class, and state management is how we keep track of data that changes over time in an app; we need these to make our app interactive and respond to user actions.
Input,Button: Custom UI components, As you already know, we are using Shadcn UI with TailwindCSS. Thus, we need to install the predefined beautiful components by Shadcn using the following command:npx shadcn@latest init button input.- After running this command, two new components will be installed in our app’s component/ui folder. Then, we can simply import these components to use them inside our main component. This way, we can create different parts of the user interface (UI).
State and References
const [duration, setDuration] = useState<number | string>("");
const [timeLeft, setTimeLeft] = useState<number>(0);
const [isActive, setIsActive] = useState<boolean>(false);
const [isPaused, setIsPaused] = useState<boolean>(false);
const timerRef = useRef<NodeJS.Timeout | null>(null);- We use state to keep track of various values in our timer. The
durationis the time the user sets,timeLeftis how much time is left,isActivetells us if the timer is running, andisPausedshows if the timer is paused. ThetimerRefhelps us store the timer ID so we can control the interval.
Functions for Timer Control
const handleSetDuration = (): void => {
  if (typeof duration === "number" && duration > 0) {
    setTimeLeft(duration);
    setIsActive(false);
    setIsPaused(false);
    if (timerRef.current) {
      clearInterval(timerRef.current);
    }
  }
};- The
handleSetDurationfunction sets the countdown time based on the user's input. It checks if the input is a positive number, sets the remaining time, and ensures the timer is not active or paused, also clearing any existing timer interval.
const handleStart = (): void => {
  if (timeLeft > 0) {
    setIsActive(true);
    setIsPaused(false);
  }
};- The
handleStartfunction begins the countdown if there's time left. It sets the timer as active and ensures it is not paused.
const handlePause = (): void => {
  if (isActive) {
    setIsPaused(true);
    setIsActive(false);
    if (timerRef.current) {
      clearInterval(timerRef.current);
    }
  }
};- The
handlePausefunction pauses the countdown if the timer is active. It marks the timer as paused, stops it from being active, and clears any existing timer interval.
const handleReset = (): void => {
  setIsActive(false);
  setIsPaused(false);
  setTimeLeft(typeof duration === "number" ? duration : 0);
  if (timerRef.current) {
    clearInterval(timerRef.current);
  }
};- The
handleResetfunction stops the timer and resets it to the initial duration set by the user. It sets the timer to inactive, not paused, and clears any existing timer interval.
useEffect for Countdown Logic
useEffect(() => {
  if (isActive && !isPaused) {
    timerRef.current = setInterval(() => {
      setTimeLeft((prevTime) => {
        if (prevTime <= 1) {
          clearInterval(timerRef.current!);
          return 0;
        }
        return prevTime - 1;
      });
    }, 1000);
  }
  return () => {
    if (timerRef.current) {
      clearInterval(timerRef.current);
    }
  };
}, [isActive, isPaused]);- useEffect: The
useEffectstarts a timer that decreases the time left every second when the timer is active and not paused. It also ensures the timer is cleared when the component updates or unmounts, so I know that you don’t know about these two stuffs component update and mounting and most importantly using useEffect hook. Ok, no problem let me explain these things in simple words.
What does useEffect hook do?
The
useEffecthook lets you run side effects in function components, such as fetching data or setting up timers. We use it to perform actions that need to happen after the component renders or when certain state variables change.What is component mounting and update?
Component mounting is when a React component is first added to the DOM and becomes visible on the screen. Component update happens when the component's state or props change, causing it to re-render and update the displayed content.
Helper Functions
const formatTime = (time: number): string => {
  const minutes = Math.floor(time / 60);
  const seconds = time % 60;
  return `${String(minutes).padStart(2, "0")}:${String(seconds).padStart(2, "0")}`;
};
const handleDurationChange = (e: ChangeEvent<HTMLInputElement>): void => {
setDuration(Number(e.target.value) || "");
};The formatTime function converts a time in seconds into a string formatted as minutes and seconds (mm). It calculates the minutes and seconds, then ensures they are displayed with two digits.
The handleDurationChange function updates the duration state when the user types a new value into the input field. It converts the input value to a number or sets it to an empty string if the input is invalid.
JSX Return Statement
  return (
    <div className="flex flex-col items-center justify-center h-screen bg-gray-100 dark:bg-gray-900">
      {/* Timer box container */}
      <div className="bg-white dark:bg-gray-800 shadow-lg rounded-lg p-8 w-full max-w-md">
        {/* Title of the countdown timer */}
        <h1 className="text-2xl font-bold mb-4 text-gray-800 dark:text-gray-200 text-center">
          Countdown Timer
        </h1>
        {/* Input and set button container */}
        <div className="flex items-center mb-6">
          <Input
            type="number"
            id="duration"
            placeholder="Enter duration in seconds"
            value={duration}
            onChange={handleDurationChange}
            className="flex-1 mr-4 rounded-md border-gray-300 dark:border-gray-600 dark:bg-gray-700 dark:text-gray-200"
          />
          <Button
            onClick={handleSetDuration}
            variant="outline"
            className="text-gray-800 dark:text-gray-200"
          >
            Set
          </Button>
        </div>
        {/* Display the formatted time left */}
        <div className="text-6xl font-bold text-gray-800 dark:text-gray-200 mb-8 text-center">
          {formatTime(timeLeft)}
        </div>
        {/* Buttons to start, pause, and reset the timer */}
        <div className="flex justify-center gap-4">
          <Button
            onClick={handleStart}
            variant="outline"
            className="text-gray-800 dark:text-gray-200"
          >
            {isPaused ? "Resume" : "Start"}
          </Button>
          <Button
            onClick={handlePause}
            variant="outline"
            className="text-gray-800 dark:text-gray-200"
          >
            Pause
          </Button>
          <Button
            onClick={handleReset}
            variant="outline"
            className="text-gray-800 dark:text-gray-200"
          >
            Reset
          </Button>
        </div>
      </div>
    </div>
);- The return statement defines the structure of the countdown timer UI. It uses a container
divwith Flexbox properties to center the content on the screen, and sets a background color that adjusts based on light or dark mode. Inside this container, there's anotherdivthat acts as the timer box, styled with a background color, shadow, rounded corners, padding, and a maximum width for better presentation. - Inside the timer box, there’s a title for the countdown timer, an input field for entering the duration, and a set button to apply the duration. The formatted remaining time is displayed prominently in large text, and there are three buttons for starting, pausing, and resetting the timer. Each button has an outline style and adjusts its label based on the state of the timer (e.g., showing “Resume” if the timer is paused). This structure ensures a clear and user-friendly interface for the countdown timer functionality.
(Bonus just for you): Full Code with Comments
To help you understand each line of code more easily while you're coding, please start coding if you haven't already. Coding helps more than just reading, by the way. I have added a comment to each line of code so that you don't get stuck at any point. I want you to become a good developer who knows everything about Next.js and the tech stack we're using.
"use client"; // Enables client-side rendering for this component

import { useState, useRef, useEffect, ChangeEvent } from "react"; // Import React hooks and types
import { Input } from "@/components/ui/input"; // Import custom Input component
import { Button } from "@/components/ui/button"; // Import custom Button component

export default function Countdown() {
  // State to manage the duration input
  const [duration, setDuration] = useState<number | string>("");
  // State to manage the countdown timer value
  const [timeLeft, setTimeLeft] = useState<number>(0);
  // State to track if the timer is active
  const [isActive, setIsActive] = useState<boolean>(false);
  // State to track if the timer is paused
  const [isPaused, setIsPaused] = useState<boolean>(false);
  // Reference to store the timer ID
  const timerRef = useRef<NodeJS.Timeout | null>(null);

  // Function to handle setting the duration of the countdown
  const handleSetDuration = (): void => {
    if (typeof duration === "number" && duration > 0) {
      setTimeLeft(duration); // Set the countdown timer
      setIsActive(false); // Reset active state
      setIsPaused(false); // Reset paused state
      // Clear any existing timer
      if (timerRef.current) {
        clearInterval(timerRef.current);
      }
    }
  };

  // Function to start the countdown timer
  const handleStart = (): void => {
    if (timeLeft > 0) {
      setIsActive(true); // Set the timer as active
      setIsPaused(false); // Unpause the timer if it was paused
    }
  };

  // Function to pause the countdown timer
  const handlePause = (): void => {
    if (isActive) {
      setIsPaused(true); // Set the timer as paused
      setIsActive(false); // Set the timer as inactive
      // Clear any existing timer
      if (timerRef.current) {
        clearInterval(timerRef.current);
      }
    }
  };

  // Function to reset the countdown timer
  const handleReset = (): void => {
    setIsActive(false); // Set the timer as inactive
    setIsPaused(false); // Set the timer as not paused
    setTimeLeft(typeof duration === "number" ? duration : 0); // Reset the timer to the original duration
    // Clear any existing timer
    if (timerRef.current) {
      clearInterval(timerRef.current);
    }
  };

  // useEffect hook to manage the countdown interval
  useEffect(() => {
    // If the timer is active and not paused
    if (isActive && !isPaused) {
      // Set an interval to decrease the time left
      timerRef.current = setInterval(() => {
        setTimeLeft((prevTime) => {
          // If time is up, clear the interval
          if (prevTime <= 1) {
            clearInterval(timerRef.current!);
            return 0;
          }
          // Decrease the time left by one second
          return prevTime - 1;
        });
      }, 1000); // Interval of 1 second
    }
    // Cleanup function to clear the interval
    return () => {
      if (timerRef.current) {
        clearInterval(timerRef.current);
      }
    };
  }, [isActive, isPaused]); // Dependencies array to rerun the effect

  // Function to format the time left into mm:ss format
  const formatTime = (time: number): string => {
    const minutes = Math.floor(time / 60); // Calculate minutes
    const seconds = time % 60; // Calculate seconds
    // Return the formatted string
    return `${String(minutes).padStart(2, "0")}:${String(seconds).padStart(
      2,
      "0"
    )}`;
  };

  // Function to handle changes in the duration input field
  const handleDurationChange = (e: ChangeEvent<HTMLInputElement>): void => {
    setDuration(Number(e.target.value) || ""); // Update the duration state
  };

  // JSX return statement rendering the Countdown UI
  return (
    // Container div for centering the content
    <div className="flex flex-col items-center justify-center h-screen bg-gray-100 dark:bg-gray-900">
      {/* Timer box container */}
      <div className="bg-white dark:bg-gray-800 shadow-lg rounded-lg p-8 w-full max-w-md">
        {/* Title of the countdown timer */}
        <h1 className="text-2xl font-bold mb-4 text-gray-800 dark:text-gray-200 text-center">
          Countdown Timer
        </h1>
        {/* Input and set button container */}
        <div className="flex items-center mb-6">
          <Input
            type="number"
            id="duration"
            placeholder="Enter duration in seconds"
            value={duration}
            onChange={handleDurationChange}
            className="flex-1 mr-4 rounded-md border-gray-300 dark:border-gray-600 dark:bg-gray-700 dark:text-gray-200"
          />
          <Button
            onClick={handleSetDuration}
            variant="outline"
            className="text-gray-800 dark:text-gray-200"
          >
            Set
          </Button>
        </div>
        {/* Display the formatted time left */}
        <div className="text-6xl font-bold text-gray-800 dark:text-gray-200 mb-8 text-center">
          {formatTime(timeLeft)}
        </div>
        {/* Buttons to start, pause, and reset the timer */}
        <div className="flex justify-center gap-4">
          <Button
            onClick={handleStart}
            variant="outline"
            className="text-gray-800 dark:text-gray-200"
          >
            {isPaused ? "Resume" : "Start"}
          </Button>
          <Button
            onClick={handlePause}
            variant="outline"
            className="text-gray-800 dark:text-gray-200"
          >
            Pause
          </Button>
          <Button
            onClick={handleReset}
            variant="outline"
            className="text-gray-800 dark:text-gray-200"
          >
            Reset
          </Button>
        </div>
      </div>
    </div>
  );
}
Okay, you’ve completed the main component with working functionality and UI. Now, you need to import this component into the app directory to use it in the page.tsx file. Your final code should look like this:
import Countdown from "@/components/count-down";

export default function Home() {
  return (
    <div>
      <Countdown />
    </div>
  );
}
The great thing about Next.js is that it follows a component-based architecture. So, what does that mean?
Component-based architecture in Next.js involves building applications by composing small, reusable pieces called components. Each component encapsulates its own logic, styling, and state, making it easy to develop, maintain, and scale applications.
Now that you have built your first Next.js project using this guide, let’s run it on the development environment using the following command: npm run dev and open the localhost:3000 in the browser to see it working.
Make sure to test it properly (each and everything) so that we don’t have any errors in the production mode. ahh, I know you have been thinking about the Development and Production environment, let me explain.
A development environment is where you build and test your application, allowing for debugging and making changes. A production environment is where the final version of your application runs for users, optimized for performance and stability.
I think we’re done with the development work. Now, we want people to see our application on the internet. All you have to do is create a repository on GitHub and then push your code to it. After that, deploy the Countdown Timer application using Vercel. We will be using Vercel for our deployment because it’s easy, simple, and free.
Once you’re done with the deployment, please share the application link with me by commenting on this blog post, on Linkedin, and (most importantly, on X a.k.a. Twitter. Tag me there, and I’ll reply and appreciate your efforts) 👀
(Optional): One thing you can do on your own is to add new functionalities, enhance the styling, and improve the overall application. This way, you’ll learn something new by making modifications.
✨ Star Github Repository of the project 👈
Conclusion
In this blog post, we explored the creation of a countdown timer using Next.js. We covered:
- The purpose and main features of the application.
- A detailed breakdown of the
count-down.tsxcomponent, explaining how each part of the code works together. - The important things and points are explained in simple words.
See you tomorrow with the latest project. Happy coding!

Stay updated with the latest in cutting-edge technology! Follow me:
- Twitter: @0xAsharib
- LinkedIn: Asharib Ali
- GitHub: AsharibAli
- Website: asharib.xyz
Thanks for reading!